こんにちは、もぐのサダノです。
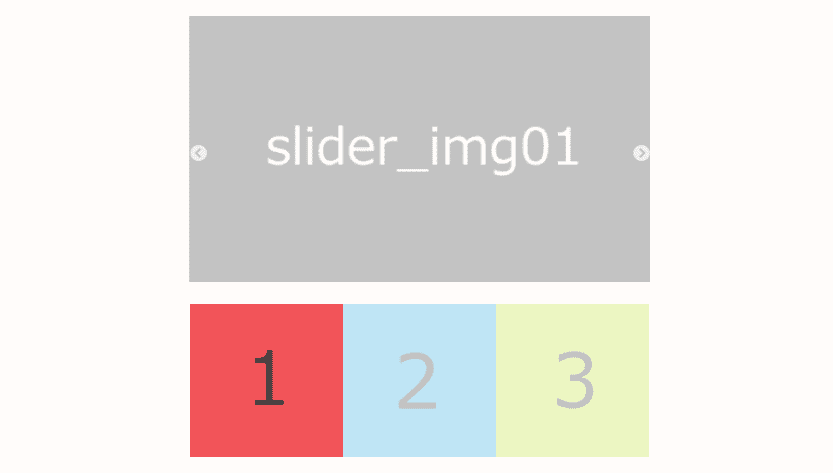
受注する案件で、当記事サムネイルのようにスライダーのドットがカスタマイズされたものが入っていたりします。
今回はslick.jsを使用したスライダーのドットのカスタマイズ方法をデモを交えながら記します。
通常のslickスライダーはご理解されている前提で進めていきますので、
「slickスライダー初めて」という方はまずこちらからご参考に頂ければと思います。
slick.jsでシンプルなスライダーを実装する方法【たった4ステップです】
①通常のslickスライダーを実装します
<div class="slider">
  <div><img src="./img/slider_img01.jpg"></div>
  <div><img src="./img/slider_img02.jpg"></div>
  <div><img src="./img/slider_img03.jpg"></div>
</div>

<style>
  .slider{
    width:300px;
    margin:0 auto;
    height:auto!important;
  }
</style>

<link rel="stylesheet" type="text/css" href="https://cdnjs.cloudflare.com/ajax/libs/slick-carousel/1.9.0/slick.css"/>
<link rel="stylesheet" type="text/css" href="https://cdnjs.cloudflare.com/ajax/libs/slick-carousel/1.9.0/slick-theme.css">
<script src="https://ajax.googleapis.com/ajax/libs/jquery/3.3.1/jquery.min.js"></script>
<script type="text/javascript" src="https://cdnjs.cloudflare.com/ajax/libs/slick-carousel/1.9.0/slick.min.js"></script>

<script>
  $('.slider').slick({
    autoplay: true,         //自動再生
    autoplaySpeed: 2000,    //自動再生のスピード
    speed: 800,             //スライドするスピード
    dots: true,             //スライドしたのドット
    arrows: true,           //左右の矢印
    infinite: true,         //スライドのループ
    pauseOnHover: false,    //ホバーしたときにスライドを一時停止しない
  });
</script>
②ドットに画像を当て込みます
CSSに記述を追加してドットに画像を当て込みます
.slick-dots li:nth-of-type(1) button:before{
  background: url("./img/number1.png") no-repeat;
  background-size: contain!important;
}
.slick-dots li:nth-of-type(2) button:before{
  background: url("./img/number2.png") no-repeat;
  background-size: contain!important;
}
.slick-dots li:nth-of-type(3) button:before{
  background: url("./img/number3.png") no-repeat;
  background-size: contain!important;
}
まだドットが邪魔してますが、なんとなく画像が背景に出ました。
③ドットを消します
デフォルトではwidthとheightが固定になってるのでこちらも手を加えて
親要素に合わせるように100%で上書きしておきます。
.slick-dots li button:before{
  content: ''!important;
  height:100%!important;
  width: 100%!important;
}
ドットが消えて画像が表に出てきました。
④カスタマイズしたドットボタンのサイズを調整します
ドット一つ一つの大親は.slick-dots liなのでここにサイズを指定します。
.slick-dots li buttonにもデフォルトで固定のwidthとheightが入ってるので親に合わせるために100%にします。
.slick-dots li{
  width: 99px!important;
  height:99px!important;
  margin: 0!important;
}
.slick-dots li button{
  width:100%!important;
  height:100%!important;
}
位置がずれてますがドットボタンのサイズがいい感じになりました。
⑤最後にドットボタンの位置を調整します
ドットボタンの位置がずれているのは.slick-dotsにデフォルトで指定されているマイナスbottomが原因なのでbottomを初期化して、スライダーとの幅をとるためにmargin-topを指定します。
.slick-dots{
  bottom: initial!important;
  margin-top:20px!important;
}
ドットボタンのカスタマイズが完了しました。
以上、slick.jsのスライダーでドットをカスタマイズする方法を記しました。
ドットをさらにカスタマイズしてサムネイル付きのスライダーを作成する方法も記していますので興味がある方はご参照ください。
slick.jsでサムネイルスライダーを作成(改善版)
また、ドットカスタマイズ系だと下記のような記事達もあります。
slick.jsでドットをスライダーの上に持っていく方法
slick.jsでドットを数字にする
slick.jsのドットをコピーして動かす
また、下記ではslick.jsで実装できる様々なスライダーを紹介しているので興味があればご参考ください!
slick.jsでよく作るスライダーを10種類紹介
ソースコード全文
最後に全コードを載せておきます。
<div class="slider">
  <div><img src="./img/slider_img01.jpg"></div>
  <div><img src="./img/slider_img02.jpg"></div>
  <div><img src="./img/slider_img03.jpg"></div>
</div>

<style>
  .slider{
    width:300px;
    margin:0 auto;
    height:auto!important;
  }

  /********ドットカスタマイズ*******/
  .slick-dots li:nth-of-type(1) button:before{
    background: url("./img/number1.png") no-repeat;
    background-size: contain!important;
  }
  .slick-dots li:nth-of-type(2) button:before{
    background: url("./img/number2.png") no-repeat;
    background-size: contain!important;
  }
  .slick-dots li:nth-of-type(3) button:before{
    background: url("./img/number3.png") no-repeat;
    background-size: contain!important;
  }
  .slick-dots li button:before{
    content: ''!important;
    height:100%!important;
    width: 100%!important;
  }
  .slick-dots li{
    width: 99px!important;
    height:99px!important;
    margin: 0!important;
  }
  .slick-dots li button{
    width:auto!important;
    height:auto!important;
  }
  .slick-dots{
    bottom: initial!important;
    margin-top:30px!important;
  }
	/*********************************/
</style>


<link rel="stylesheet" type="text/css" href="https://cdnjs.cloudflare.com/ajax/libs/slick-carousel/1.9.0/slick.css"/>
<link rel="stylesheet" href="https://cdnjs.cloudflare.com/ajax/libs/slick-carousel/1.9.0/slick-theme.css">
<script src="https://ajax.googleapis.com/ajax/libs/jquery/3.3.1/jquery.min.js"></script>
<script type="text/javascript" src="https://cdnjs.cloudflare.com/ajax/libs/slick-carousel/1.9.0/slick.min.js"></script>


<script>
  $('.slider').slick({
    autoplay: true,         //自動再生
    autoplaySpeed: 2000,    //自動再生のスピード
    speed: 800,             //スライドするスピード
    dots: true,             //スライドしたのドット
    arrows: true,           //左右の矢印
    infinite: true,         //スライドのループ
    pauseOnHover: false,    //ホバーしたときにスライドを一時停止しない
  });
</script>


コメント